

Connecting AAArdvark to Zapier
Introduction
AAArdvark doesn’t have a dedicated Zapier app, but you can connect the two in a few minutes using outgoing webhooks and Zapier’s own Webhooks trigger. You won’t need to write any code for this.
Before you start
You’ll need:
- A Zapier account on one of their paid plans. The Webhooks trigger you’ll use in Step 1 isn’t available on the free plan.
- A few minutes on the AAArdvark side to add an outgoing webhook integration. If you haven’t done that before, the Setting Up an Outgoing Webhook guide covers it in full – this guide only covers the Zapier-specific parts.
Connecting AAArdvark to Zapier
Step 1: Start a Zap with a Catch Hook trigger
- In Zapier, click Create Zap.
- For the trigger app, search for and select Webhooks.
- Choose Catch Hook as the trigger event, then click Continue.
Step 2: Copy your AAArdvark secret into Zapier
- Switch to AAArdvark. From your site’s dashboard, go to Integrations, click Add Integration, then Outgoing Webhook.
- AAArdvark generates a Webhook Secret for this integration. Copy it – don’t fill in the Webhook URL or save yet, you’ll finish this integration in Step 3.
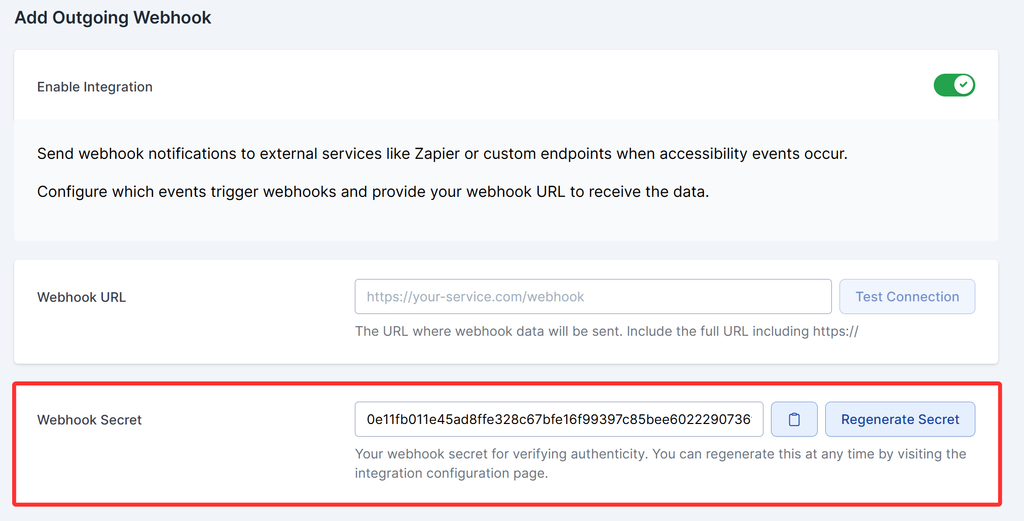
- Back in Zapier, on the Configure tab, paste the secret into the Pick off a Child Key field.
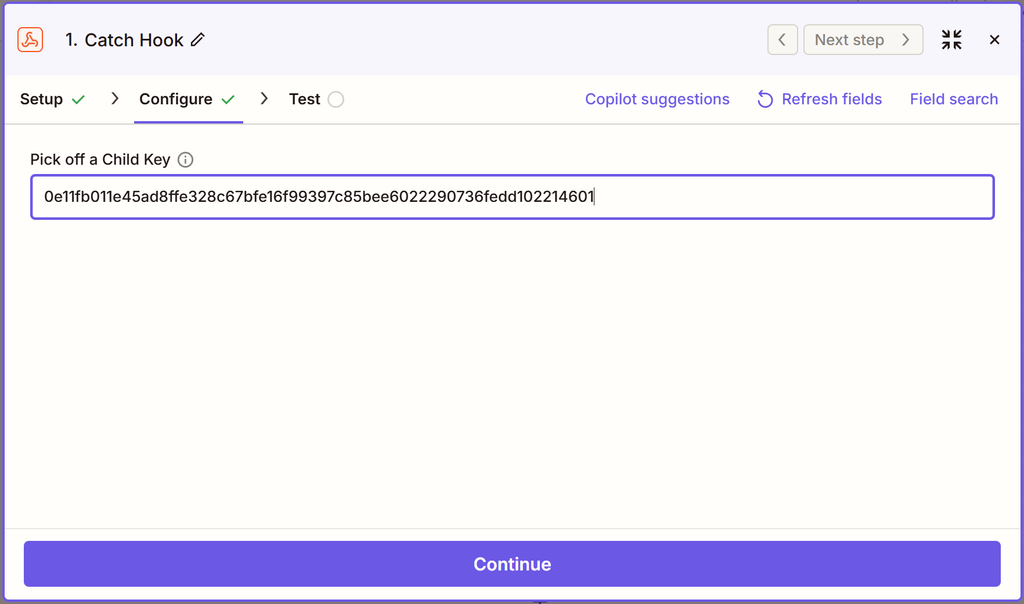
- Click Continue.
Step 3: Finish the AAArdvark integration with your webhook URL
- Zapier’s Test tab now shows your Zap’s webhook URL. Copy it.
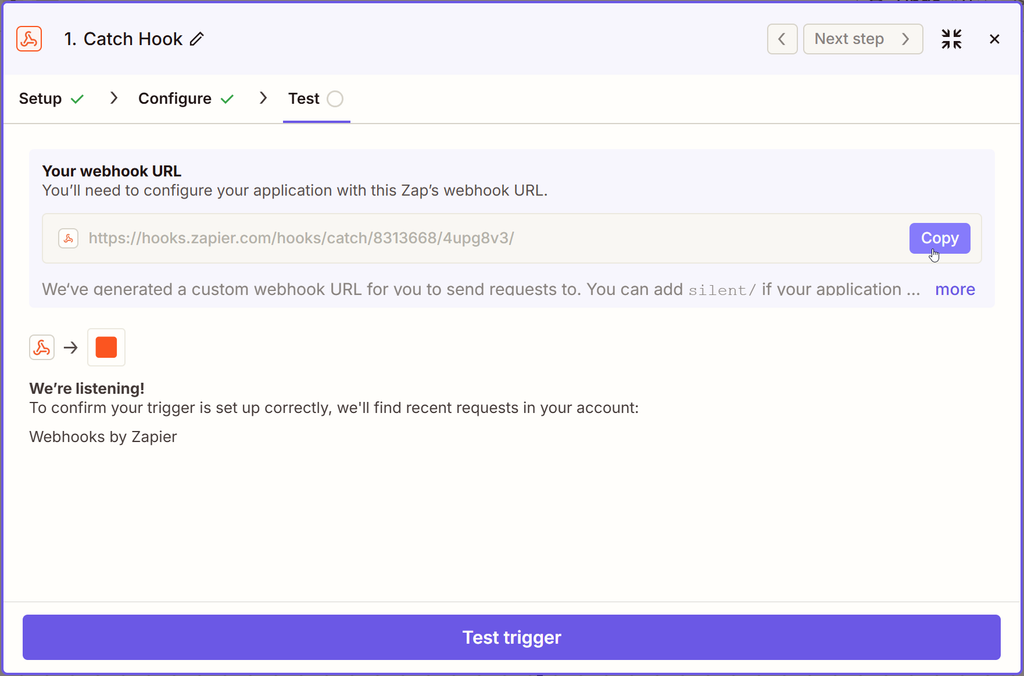
- Back in AAArdvark, paste that URL into the Webhook URL field on the integration you started in Step 2.
Step 4: Test the connection
- In AAArdvark, click Test Connection next to the Webhook URL field. This sends a sample event to your Zap’s webhook URL.
- In Zapier, go back to the Test tab and click Find new records. Zapier should show the sample payload it just received from AAArdvark. If Zapier doesn’t find anything, double check the URL was pasted correctly on the AAArdvark side.
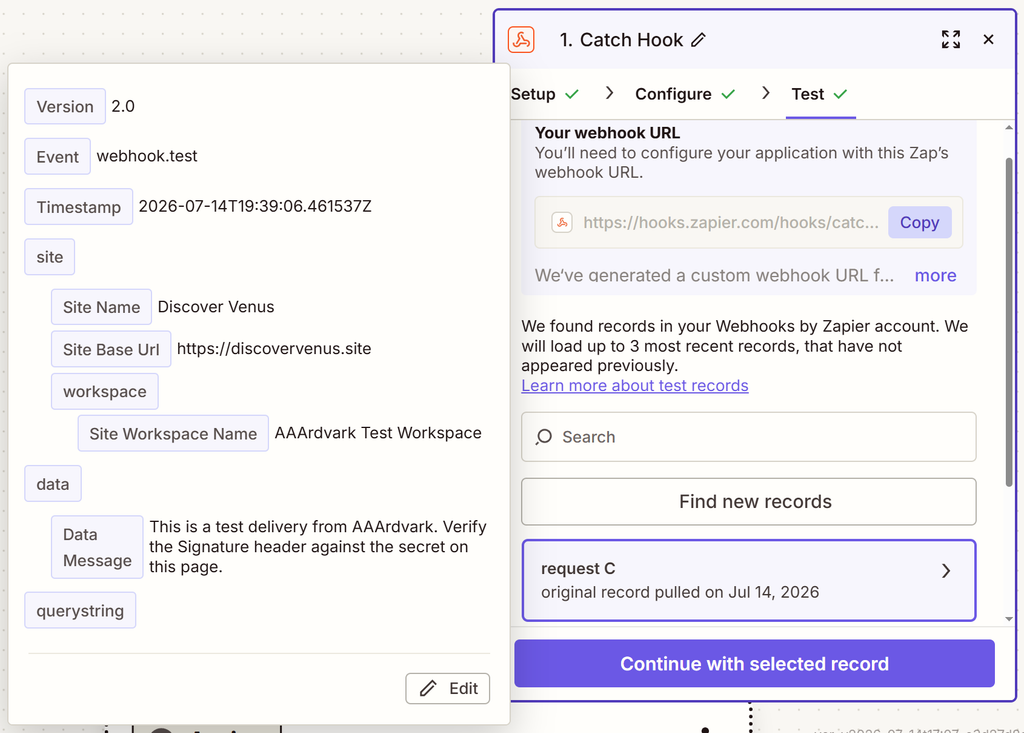
- Once the test succeeds, head back to AAArdvark. Under Webhook Events, check the boxes for whichever events you want to trigger an event in Zapier. You can select from the following:
- Issue Events – Created, Status Changed
- Issue Instance Events – Created, Created (Batched), Status Changed
- Scan Events – Completed
- Save the integration.
Webhooks only fire for events going forward from when you save – past activity doesn’t get pushed automatically.
If you want your Zap to backfill everything that’s already on the site, click Sync all existing data on the integration screen that shows after the integration got saved – it replays every existing issue, instance, and completed scan through the webhook in one go.
If you only need to catch up on the most recent scan, use Resend latest scan instead, and check off whether you want its issues, its instances, or both resent.
For the full walkthrough of this screen, see Setting Up an Outgoing Webhook.
Step 5: Build your Zap’s action
With the trigger working, add an action step for whatever you want to happen next. Some common ones:
- Post a message in Slack when a new issue is found.
- Add a row to a Google Sheet to track scan results over time.
- Create a card in Trello or a task in Asana so new issues land straight in your team’s workflow.
Zapier lets you map fields from the AAArdvark payload (issue title, page URL, status, and so on) into whatever your action needs.
Once you’re happy with the action, publish the Zap to turn it on.
What the data looks like
Every event arrives as a JSON payload with a common envelope plus fields specific to that event type – issue details, scan stats, and so on. The message structure guide breaks down exactly what’s in each one, which is useful when you’re mapping fields in your Zap’s action step.
Related Guides
-
Outgoing Webhooks
-
Setting Up an Outgoing Webhook
-
What’s Inside Each Webhook Message
-
Verifying Webhook Signatures